Just like a human body that gets dull and old with time, a machine like chainsaw is no exception!
Well, one cannot reverse the process of aging in humans, but that’s certainly not the case with a powerful tool like a chainsaw.
This guide, therefore, explores and answers one of the most commonly asked questions, i.e. “how to sharpen a chainsaw” from different angles and perspectives.
I have done my job to make sure that homeowners or even beginners can take full benefit of this guide so that they can restore their chainsaws to its original shape without much hassle.
Let’s take a look, without any further ado:
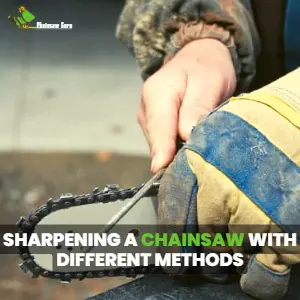
How to Sharpen a Chainsaw in 2026? A Detailed Guide
When we talk about the SHARPENING PROCESS, the attention shifts towards sharpening a chainsaw chain.
If it’s dull, you will not be able to slice the trees with your cutting companion as expected.
That said, you will also need some supplies before getting started with the sharpening process.
Let’s talk about them first:
Supplies You Will Need to Sharpen a Chainsaw
The tools that you will require for sharpening a chainsaw are the Dremel tool, a Dremel tool sharpening kit, a round file, and a flat file.
Along with this equipment, you also need to have a file guide that you will need for sharpening the blades of the chainsaw.
You also need to have a Depth gauge guide which is also required for sharpening chainsaw chain blades.
Once you gather all the tools, it is time to start the main operation of sharpening the chainsaw chain.
Let’s take a look, without any further ado:
Part 1: Setting the File
Step 1: Take the right place to place the chainsaw.
When you sharpen the chainsaw chain, you need to give strokes. With each stroke, the chainsaw will keep displacing. To hold it in a steady position, you need to find the proper surface. The first thing that you need to do is to find a flat surface where you can place your gas chainsaw. Attach the chainsaw bar on the clamp to hold it tightly.
In case, you do not have a clamp, you can take off the chainsaw chain from the bar. Then, attach it with your vise, as it is the best possible alternative. Or you can place the chainsaw upside down on the place where you need to work.
Remember that there is no right and wrong sort of issue in placing the chainsaw. You can choose any method that is easy and suitable for you. Just the purpose is to keep the chain steady so that you can file it easily.
Step 2: Tightening the chainsaw chain
The next step is to tighten the chainsaw chain. Look for the tension-adjusting screw. Mostly, you will find that screw is perpendicular to the chain direction. If you could not find it there, take help from the user guide manual.
Tighten the tensioning screw until the chain gets a good grip on the bar. Make sure that the chain is tight enough that you need little effort to move it through the bar. Also, do not over-tighten it.
Step 3: Marking the starting point
Once you are done with placing the chainsaw and tensioning the chain, it is time to start the process of sharpening. Take a marker and mark the tooth from which you are intending to start sharpening. It will help you to keep track and you will evenly sharpen all teeth.
Some people might not like marking their chain so in this case, you can look for a special tooth that does not have teeth. If you are not comfortable even with this method, then try another way. Look for the unique link that is of different colors and keep it as your mark.
Step 4: Selecting the file
There are different models of chainsaws and thus they have different chains. Also, the chains are of different sizes. They have different sizes of teeth on them. So when you are selecting the file, for sharpening the chainsaw teeth, you must have been having the same size of the file as that of the diameter of the chain’s teeth.
You can find the perfect size of the file in the user manual. Or else, if you have lost it, you can also determine the correct file size online. Normally the sizes are 4 mm, 4.8mm, and 5.6mm respectively.
Step 5: Take the right position of the file
Place the file on the notch of the teeth. Make sure that you insert the file in the tooth while making the correct angle. As you do so, 80% of the file should be inside the teeth and a little bit above it.
You will see that your chainsaw chain has two types. Therefore, file the one type first while leaving every second tooth (that is of a different type). You can file the different sets of teeth once you are done with the first type.
Step 6: Keeping the angle correctly
It is difficult to keep the position and angle of the file steady. You need to count the strokes to sharpen all the teeth evenly and upward how much you insert the file in the tooth. Keeping all these things in mind can distract you and affect the angle.
To overcome this problem, you can use a file holder. It will keep the direction of the file steady and thus you can work easily. For most chains, an angle of 25° or 30° is required. You better check the desired angle for your chainsaw chain.
Part 2: Sharpening the Cutters
Step 7: Making the top of the chain even
Place the file over the flat top of the chainsaw chain. Make the desired angle and give firm strokes to the file. Be careful that you do not put a lot of pressure on the file while doing so. Also, it should not be very gentle but it should be in a way it works with firm strokes.
One more thing that you must keep in mind is that the strokes must always be in one direction. It means to make sure that you are not pulling the file back. Doing so will damage both the file and the chain. In addition, be aware of the angles while carrying out each stroke.
Step 8: Filing the cutters evenly
Keep repeating the same procedure and make sure that you file each tooth the same. For this, you should keep counting the strokes that you make. Let’s say you are giving 5 o maybe 7 strokes, then you must follow this number of strokes for all teeth.
If you are not sure whether you have sharpened the teeth sufficiently, let me tell you how you can check that. Look for the burr on the top, if you find it then it needs to be sharpened more.
When it gets sufficiently sharpened, you will see the metal shining like new. Also, keep dusting the metal leftovers in the file that gets there while filing.
Step 9: Sequence of sharpening
Once you are done with sharpening all teeth, it is time to file cutters. Start from the mark that you used for an indication in the first place. Cutters are present in alternate directions so if you will move in sequence, you would need to change the direction by 180 degrees.
Thus, to save your time and work smartly, first file all the cutters in the same direction. You will do that by filing every second cutter. In this manner, sharpen all the cutters in the same direction.
Step 10: Changing the direction by 180° angle
Then, loosen the clamp and change the direction of the chainsaw bar having a chain by 180 degrees. File the cutters in the opposite direction that you left in the first turn. Changing the direction of the chain is easy because you would not need to change your ways of carrying out the operation.
Step 11: Sharpening the remaining tooth
Similarly, sharpen the remaining tooth that you left in the first place. Keep following the directions, angles, and all of the guidelines mentioned above. In addition, the number of strokes must remain the same to sharpen the chainsaw evenly.
Part 3: Filing the Rakers
Step 12: Placing the depth gauge over the chain
If you are hearing it for the first time or do not know much about what a depth gauge is then let me tell you. It is a tool that is used to level the height of the rakers. Filing the rakers is important because if they would not of the same height, the cutting would not be smooth.
What you need to do is to place the depth gauge over the rakers first. Then, start moving the raker in the forward direction until it comes in contact with the depth gauge. For this, you again need to use the same starting point that you have marked from the start.
Step 13: Inspecting the parts
After you place the depth gauge in the perfect position, inspect the rakers. Inspecting means you need to check whether or not the raker needs to be filed. You can check it by observing or looking for the height of the raker.
If the raker is above the height of the depth gauge, it means you need to file it. Or else, you can move ahead to the next raker. Because if the heights of the raker and depth gauge are the same, it is filed.
Step 14: Making the rakers even
You have found rakers that need to be filed. Learn how to file it. For filing the rakers, it is better to have a flat file as it works better for the rakers than a round file. File the raker until it matches the height of the depth gauge.
But wait! It is not that simple. You must be careful about the fact that the depth gauge is not being filed along with the raker. If it happens, you would not be able to sharpen all the rakers equally.
To avoid this, you can slide away the depth gauge while filing. In this case, you also need to keep checking continuously if you reached your goal or not. After filing the height, file the edges of the raker to move them smoothly. Make sure that the height does not get disturbed while smoothing edges.
Step 15: Filing the rakers
Repeat the same process with every raker. First, check the height by using the depth gauge and then file accordingly. While making the rakers even you do not need to worry about remembering which needs to be filed. The reason is that you check each raker before you file it.
Step 16: Releasing tension of chainsaw chain to normal
Done with sharpening teeth, cutters, and rakers? Good job! Remember you tightened the chain before you started sharpening? Now it is time to reset the chain tension to its normal tension.
Use the screwdriver and rotate the tensioning screw in an anti-clockwise direction to loosen the chain. Check for the perfect chain tension and bring it to the correct tension.
Step 17: Filling the oil reservoirs
Flip the battery chainsaw to make the tank cap visible. Unscrew the cap and add oil to the tank by using a funnel. Use the oil that is best suitable for the type and model of your chainsaw. Put the cap back and tighten it to avoid oil leakage.
How to Sharpen a Chainsaw with an Electric Sharpener
Supplies You Will Need:
There are electric sharpeners available that you can use to sharpen your chainsaw chain. For that, you need to have a chainsaw sharpener, a matching size of stone with your chain pitch and gauge, and a clamp or a vise that holds the chain.
Steps to Follow:
Step 1:
Place the chainsaw chain over the clamp or vise, whatever you feel is suitable. It will prevent the chain from moving while you work.
Step 2:
Set the chain at the right angle. You can follow the guidelines for making the right angle. Normally, the guide comes with an electric sharpener.
Step 3:
Bring the grinding wheel down to file the chainsaw chain.
Step 4:
Loosen the clamp or vise, to release the chain. Bring the other part that you want to sharpen while keeping the angle the same.
Step 5:
Repeat the process to file the chainsaw chain completely. While you are sharpening, change the sides of the grinding stone to prevent one side from being continuously used.
For a detailed process, follow: How to Use an Electric Chainsaw Sharpener?
How to Sharpen a Chainsaw with a Dremel?
Supplies You Will Need
One of the methods of sharpening the chainsaw chain is by using a Dremel kit. For this, you need to have safety gloves, safety goggles, a Dremel kit, a Dremel guide, and a clamp of the vise. Once you gather these basic tools, follow the steps below to sharpen the chain with Dremel.
Steps to Follow:
Step 1:
Attach the chain on a clamp and fix it there. As you already know that fixing the chain in a steady position is of keen importance.
Step 2:
Make the correct angles. You can use the manual guide that comes with the Dremel to make the correct angles.
Step 3:
Mark the starting point and start sharpening chain teeth. As I have already told you about the alternate positions of the chainsaw teeth, first complete one side pointing teeth.
Step 4:
Reverse the direction of the chain so that you do not need to change your position and angles. Loosen the clamp and rotate the chain to 180 degrees.
Step 5:
Start sharpening the teeth on the opposite side. Keep doing this until you reach the starting point. Here you are done with sharpening all of the teeth of the chain.
Learn the detailed chainsaw sharpening with dremel here!
How to Sharpen a Chainsaw with a Drill?
Did you know that you can use a drill to sharpen your chainsaw chain? Yes, it is the easy and fast way that you can follow. Though you need to consider all the tricks and tips it is a faster process.
Supplies You Will Need
To sharpen your chainsaw with a drill, you need to have some supplies. They are electric sockets from where you can provide current to the drill. A drill and a clamp or vise to hold the chain.
Follow the steps below to efficiently sharpen your chainsaw chain with a drill.
Steps to Follow:
Step 1:
Place the chain on the clamp or vise to keep it steady.
Step 2:
Plug in the drill socket and check if it runs properly.
Step 3:
Mark the starting point to avoid sharpening the same teeth. Follow the angle marks on the chain to make the correct position for sharpening.
Step 4:
Place the drill on the marked teeth. Keep it a bit above the teeth while the rest of the drill is inside it. Sharpen all the teeth facing the same direction.
Step 5:
Change the direction of the chain to sharpen the rest of the teeth. Unplug the drill and take off the chain from the clamp as you have completed sharpening all the teeth.
How Much Does it Cost to Sharpen a Chainsaw Chain?
If you want to earn some extra bucks in your free time then sharpening chainsaw chains is a good option. The cost of chainsaw blade sharpening is around $1 to $2 for each inch. The total cost of a chain will be around $50 to $60. However, the prices may vary for different retailers.
However, if you are a chainsaw owner and your chainsaw needs to be sharpened, then do it on your own if you have time. It is not a much difficult task and spending on such a task is not a wise decision if you are not having the time or there are some other reasons.
How Often Do You Need to Sharpen a Chainsaw?
If you want to know how long does a chainsaw remain sharpened? So, it does not depend on the time. There is no defined timing for a chainsaw chain to become blunt. However, it depends on how much you are using it.
Thus, your chainsaw might not need to be sharpened for a long. It is because you are rarely using the cutting tool. The average sharpness of a chainsaw remains for 3 hours of continuous use. It means if the blades are cutting through the wood for an average of 3 hours, they need to be sharpened.
Therefore, the simple answer to your question is that if you use a chainsaw frequently, sharpen it frequently. If you are using it rarely, you need to sharpen it rarely.
Do You Need to Sharpen a New Chainsaw Chain?
When you buy a new chainsaw, the chain with it comes sharpened. Thus, you do not need to sharpen it the first time you use it. However, it does not mean that you will keep using that new chain for a long without getting the blades dull.
Even a new chainsaw chain can get blunt after using it for a while. The average duration of sharpness is 3 hours of use. The same is the case for a new chainsaw chain. The purpose is to tell you that there will be no difference in getting the chain blunt after use though it is a new chain.
Frequently Asked Questions
What is the best way to sharpen a chainsaw?
The best way of sharpening a chainsaw is the way that you follow all the guidelines and tips. Some of the key points include attaching the chainsaw chain to the clamp or vise. Other than that you must be wearing safety gloves while sharpening a chainsaw.
Moreover, the sharpening must be carried out at the right angle and in one direction. You also need to tighten the chainsaw chain more than normal before you sharpen it.
Is it worth it to sharpen a chainsaw?
Yes, sharpening a chainsaw is worthwhile because it is simply an act of foolishness if you are replacing a chainsaw chain when it gets dull. You just need to spare some time for getting the job done. Sharpening a chainsaw is worthwhile as it brings a lot of comfort and safety while carrying out cutting operations.
How do you sharpen a chainsaw blade by hand?
Sharpening a chainsaw blade by hand is not much difficult. It might take a little more time than sharpening it with an electric sharpener. You can hand sharpen a chainsaw by using a file. Take a round file, and keep it on the correct angle and at the correct height. Give strokes against the blade in one direction. Repeat the process for all the blades and you are done with the process.
Can I sharpen my own chainsaw?
Yes, why not? In fact, it is good if you are thinking of sharpening your chainsaw by yourself. It does not only save you money but you might feel it is a bit adventurous activity. Moreover, the market prices for sharpening a chainsaw are not cheap. One always feels good for saving some bucks so you should sharpen it on your own by following the detailed guides in this article.
What angle a chainsaw should be sharpened at?
Though there is not a specified angle for sharpening a chainsaw. However, you will find the angle marks on your chain besides the teeth of the chain. Follow those marks to make the correct angle. Normally, it makes an angle of 20 to 25 degrees and in some cases maybe 30 or 35 degrees. Also, you can use the manual guide that comes with your chainsaw to know about these details in specific.
How do I know if my chainsaw tooth is sharp?
There are many hints and signs that your chainsaw will give you when it needs to be sharpened. The most common method that is used for checking the sharpness of the chainsaw is a burr.
Check the waste that the chainsaw produces, if it is fine, sharpen the chainsaw. Uneven cuts by a chainsaw are also an indication of an unsharpened tooth. Also, you can look at the teeth and if they are all not on the same level, it is also an indication.
How do you check chainsaw sharpness?
The best way to check the sharpness of the chainsaw is what sort of waste t produces after cutting. If the waste produced is finely chopped, it means the chainsaw needs to be sharpened. However, if it produces large pieces of wood and they are not finely chopped, it means the chainsaw is sharp enough. In this case, you can use it more before you sharpen it.
When should I stop sharpening my chainsaw?
When the silver shiny metal appears on the surface, it is a good sign of sharpened teeth. Moreover, if you want to know when you should stop sharpening your chainsaw and start thinking about buying a new one? So, it is when the rakers reach their minimum height and the chain is worn out. It is the time when you do not need to sharpen it and buy a new one.
How much does it cost to get a chainsaw tuned up?
A rough estimate of chainsaw maintenance is around $100 to $125. However, if you can do certain things on your own, then you can definitely save some bucks. These services include sharpening chainsaws and chains or other related things. Rest, what cannot be done at home, you can get done from a repair shop.
Final Takeaways: How to Sharpen a Chainsaw in 2026?
I hope you will find this long and detailed article regarding how to sharpen a chainsaw helpful. As I have provided you with depth knowledge of every aspect related to chainsaw sharpening.
After reading this, you know now how to sharpen a chainsaw with different tools. You have clear knowledge regarding the sensitive aspects that must be taken care of. Moreover, now you can use multiple ways for sharpening a chainsaw.
You can use a drill, an electric sharpener, or a Dremel kit for sharpening. You know about every option and the cautions associated with each method. Also, some of the questions that you might be thinking of, are answered too.
his personal experience and loves to share their nitty gritty details with his audience.
Although Richard does focus on other home improvement tools, his focus remains on cutting fallen trees or maintaining his backyard via chainsaw tools. He pledges to come up with new knowledge about chainsaws every once in a while.
- 5 Best Reciprocating Saw Blades for PVC in 2026 - July 4, 2026
- 7 Best Professional Jigsaws Tested for 2026 - January 20, 2026
- 7 Best Jigsaws for Home Use in 2026 - January 20, 2026