 When it comes to assembling, mini chainsaws are no different than regular ones.
But, of course, there’s always a BUT, the question still remains firm how to assemble a mini chainsaw and that’s the reason I am here to explain it in detail.
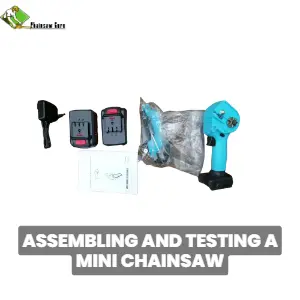
For starters, you will receive a hard plastic box which contains all the parts. You will get a pair of gloves, an oiling bottle, a main unit, two chainsaw chains, two batteries, a charger, and chainsaw bar, and other necessary equipment for setting up your mini saw from scratch.
To assemble it, you will need to put the chain on the bar first. Then, attach the chain with the chainsaw bar and tension it perfectly by moving the tensioning screw on the side. Then, put some oil for the lubrication and attach the battery with your cutting tool.
Let us now discuss the mini saw assembling procedure through a step-by-step process:
How to Assemble a Mini Chainsaw in 7 Easy Steps
In assembling a mini chainsaw, the main thing is attaching the bar and chain to the mini cutting machine. Rest, there is nothing tricky or that you should do with greater care. Thus, I will be more focused on these two aspects of assembling a battery-powered mini chainsaw. Follow the steps below to learn in detail how to assemble a mini cutter.
Step 1: Unboxing
The first step is to open the box in which you are having all the parts of your mini chainsaw. Then, read your machine’s manual thoroughly so that you get generalized information about the parts. Check all the parts and it will also get you some idea of using things.
In the box, you will get chains, a chainsaw bar, batteries, safety equipment, and necessary tools for putting together a mini chainsaw.
Step 2: Safety Measures
Following safety measures especially when dealing with the matter of chainsaws is of keen importance. Wear safety gloves, because you need to attach a chain with the chainsaw bar and it has sharp teeth that can injure your hands. Also, wear safety goggles, you will need them when you will test your mini chainsaw.
You can skip wearing safety pants because you are not dealing with a big gas chainsaw. A mini chainsaw is easy to use and there are many reduced chances of slipping and causing injury. Still, if you want to be more careful, then you can wear them as well.
Step 3: Attaching Chainsaw Bar
For attaching the bar, you need to take out the side nut, it is also called tensioning screw. Then, pop out the cover plate. Take out the bar from the wrapping and place it over the slots that you will see there.
If you are familiar with the use of the tool, then you will probably know that there is nothing new in the case of the mini chainsaw. The process of attaching the bar is similar for all chainsaws. Mini chainsaws are comparatively much easier to set up. Let’s move to the next step.
Learn More: Why Were Chainsaws Invented?
Step 4: Assembling Chainsaw Chain
Take out the chain, and place it over the bar. Make sure that you are aware of cutting teeth orientation. The teeth should be facing the opposite side of the chainsaw. Then, place the chain over the little guide grooves on the bar and settle the chain by untangling it fully.
Then, place the cover plate and the tensioning screw. Tighten your tool’s chain by rotating the screw. Keep tightening, until the chain fits perfectly on the bar. A reminder for you regarding the tensioning, do not make the chain too tight or too loose. Also, do perform a snap test to check for the perfect chain tension. You can also shorten a chainsaw chain with the help of a chainsaw chain breaker.
Step 5: Attaching the Battery
Now it’s time to put the battery on as all the parts are connected. Take out one of the batteries that you got with your mini chainsaw. you will attach the battery at the bottom of the main unit. You will see the pattern like a sliding door and you need to slide the battery over there to fix it.
Step 6: Lubrication
Are you all done? Yes, in five steps you just got everything connected to the mini chainsaw but before you start working, lubricate it. Your mini chainsaw box will be having a small bottle that you will use for filling the oil tank.
Read out the manual and determine which oil your brand recommends for lubrication. Grab that oil and fill the oil tank. Right beside the filling tank, there is a push button, give it 2 to 3 pushes to lubricate your chainsaw.
For detailed lubrication of your mini saw, read our guide on How to Oil a Mini Chainsaw!
Step 7: Testing
The final is step is to test the mini chainsaw. You can start with small branches and then to comparatively bigger ones. This is how you can test how powerful your mini chainsaw is and what it can cut through. For detailed testing, you can check my latest guide on how to use a mini saw as a beginner.
Frequently Asked Questions
1. How do you assemble a mini chainsaw?
To assemble a mini chainsaw, you need to unbox the mini chainsaw packaging. Then, attach the bar to the main unit. Place the mini chainsaw chain over the chainsaw bar and then tension it through the tensioning screw.
Attach the battery and lubricate the chainsaw by adding oil to the tank and pushing the push button. Press the trigger and your mini chainsaw will start working. Enjoy cutting!
2. How do you put the chain back on a mini chainsaw?
To put the chain back on a mini chainsaw because you are replacing the chain or there is some other reason, you first need to take off the chain. For this, you need to loosen the tensioning screw and take off the bar. Then, take off the chain, untangle it, and place it again on the bar.
Make sure that you are following the teeth’ direction. The cutting teeth of the chainsaw chain should be facing the direction in which the blade rotates. Then, insert the drive links of the chain in the guide gauge of the bar. Tension the chain by tensioning the screw until it is perfectly tensioned.
3. How do you put oil in a mini chainsaw?
In a mini chainsaw, you will see the oil reservoir tank with a cap. Usually, it is located on the top of the mini chainsaw. First, read the manual to determine what type of oil is recommended for your mini chainsaw model. Then, fill the reservoir with that oil and make sure that you do not overfill the tank. Put the cap back and tighten it. For this process, choose a suitable dry and clean place.
5. How do you reinsert a chain pin on a mini chainsaw?
You can reinsert the chain pin by taking off the chain from the bar. To do so, you need to take off the side cover plate and loosen the tensioning screw. Then, take off the chain from the bar and untangle it. Put the chain back on the bar and tension it correctly. This is how you can reinsert the chain pin on a mini chainsaw.
6. How do I set up a new mini chainsaw?
For setting up a new mini chainsaw, take out all the parts from the mini chainsaw box and have a look at all the things. Then, read the manual and get an idea about all the things. Then start attaching the parts to the main unit. First, install the chainsaw bar, then the chain, and then the battery.
You will get most of the necessary tools required for setting up the mini chainsaw, within the box. After putting all the parts, fill the oil reservoir with the recommended chain oil. Press the button to start the mini chainsaw.
7. Can a mini chainsaw cut wood?
Yes, a mini chainsaw can cut through wood. However, mini saws are not much powerful and efficient as big chainsaws. Yet, you can clear the small branches in your backyard with a mini chainsaw. It is claimed that a mini chainsaw can cut through 15 cm of wood in a few seconds.
Last Words:
This was a detailed guide on how to assemble a mini chainsaw. I have made it an easy guide for you in a few simple and clear steps. Make sure that you follow the safety measures while dealing with all types of chainsaws. In addition, the mini chainsaws are easy to operate and in setting up because of their lighter weight.
The process of assembling a mini chainsaw is not difficult especially if you are already familiar with chainsaws. Putting the chain is the same for almost all chainsaws. Also, assembling the chainsaws is closely associated with one another but there are some differences.
- 5 Best Demolition Reciprocating Saw Blades for 2026 - July 9, 2026
- 5 Best Compact Portable Reciprocating Saws for 2026 - July 9, 2026
- 5 Best Reciprocating Saws Under $100 in 2026 - July 8, 2026