Is your chainsaw brake handle not working? It’s a crucial safety feature that helps control your cutting machine’s speed and prevent it from spinning when you release the throttle. But imagine trying to cut a tree, and your chainsaw doesn’t stop when you need it to. That doesn’t create a pretty picture in your mind, right?
The consequences of a faulty brake handle can be severe, ranging from serious injuries to property damage. Therefore, if you notice any issues with it, don’t wait to get it fixed. Replace the brake handle pronto.
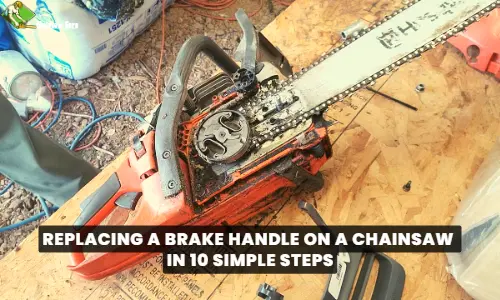
In this article, I’ll guide you through the steps of replacing the brake handle on a chainsaw to keep the machine working at its best. You’ll also learn the types of handle brakes and the common issues that can occur with them. I’ll also share how to identify if the brake handle is malfunctioning and when to replace it. Let’s dive in!
How to Replace Brake Handle on a Chainsaw?
You can replace the brake handle of a chainsaw by first removing its side cover, loosening the brake band, and detaching the old brake handle. After that, you can install the new brake handle and reassemble the chainsaw.
For Stihl chainsaw brake handle replacement, or any other brake handle in a different brand of chainsaw, you’ll need:
- Wrench, Pliers, and a flat-head screwdriver. These tools are necessary to remove and replace the side cover from your tool and brake handle bolts and adjust the brake band.
Also, remember to read your chainsaw manufacturer manual for instructions and specific tools required for your particular model. Then get on to replacing the manual or automatic brake handle.
Step 1: Remove the Spark Plug Wire
Switch off your cutting machine and remove the spark plug wire from the spark plug to prevent the machine from accidentally setting off.
Step 2: Remove the Side Cover
Use a wrench to loosen the bolts holding the side cover of your cutting tool in place. Move the wrench counterclockwise, gently pry the cover from the tool, and set it aside.
Note: For removing an automatic brake handle, you’ll also need to remove the clutch cover, chain, bar, and clutch drum to reach the brake handle assembly.
Step 3: Loosen the Brake Band
Locate the brake handle assembly, which is near the cutting tool front near the clutch drum. Then, use a flat-head screwdriver to loosen the brake band. To do this, turn the adjusting screw (small lever) located close to the brake handle. This will reduce the tension on the brake band, enabling you to remove the old brake handle.
Step 4: Disconnect the Old Brake Handle
Next, to remove the old brake handle, use a pair of pliers to detach the E-clip securing the brake handle pivot pin (connects the handle with the brake band). Make sure to keep the E-clip safe, as you’ll need it when installing the new brake handle.
Step 5: Extract the Pivot Pin
Gently slide the pivot pin out of the brake handle assembly to free the handle from the cutting machine. If necessary, you can also replace it with a handle.
Just In: The Husqvarna 120 Mark II vs Stihl MS170 Similarities and Differences Discussed!
Step 6: Remove the Brake Band
Carefully lift the brake band out of the brake handle assembly. But remember to take note of its direction before removal because you’ll need to install the new handle in the same orientation.
Step 7: Pick a New Brake Handle
Pick a new brake handle by checking your chainsaw manufacturer’s instructions for compatibility. This is to make sure the new handle is the correct replacement part for your specific cutting machine model.
Step 8: Install the New Brake Handle
Place the brake band on the new handle in the orientation indicated by your chainsaw manufacturer. Some brake bands even have directional arrows on them. Next, insert the pivot pin into the brake handle assembly, aligning it with the holes on both the brake handle and the band.
Follow up with securing the pivot pin with the E-clip. Make sure the brake handle moves smoothly and the brake band moves without restrictions.
Step 9: Reinstall the Side Cover
Reinstall the side cover on your cutting tool by aligning it with guide bars. Proceed by tightening the cover bolt using the wrench.
Step 10: Test the New Brake Handle
Once you’ve finished installing the new brake handle, test it by pulling it toward the handlebar. Then reconnect the spark plug wire to the spark plug. Switch on the chainsaw to check whether the new brake handle is working as it should. Here’s how you can test it:
- Switch on the cutting machine and let it idle.
- Pull the brake handle towards the handlebar to engage it. Check if the machine stops immediately.
- Then, release the brake handle and accelerate the machine. It should spin without restrictions.
- Repeat the steps 2 and 3 a few times. Observe whether the brake handle engages and disengages correctly and the chainsaw stops when the brake handle is engaged.
Chainsaw Brake Handle Types
There are two chainsaw brake handle types, and they include the following:
Manual
A manual cutting machine brake handle is operated by pulling the handle towards the handlebar to engage the brake. This process activates the brake band that wraps around the machine’s clutch to stop it from spinning. Manual brakes are commonly found on older or basic chainsaws.
Automatic
A manual cutting machine brake handle engages automatically due to a kickback, a sudden jolt, or another safety hazard. When you engage the brake, it stops the chain from spinning and the chainsaw from cutting.
The main difference between replacing both manual and automatic brake handles is that the latter has a more complex disassembly process. Now let’s move on to the next section, which is spotting the symptoms of a malfunctioning brake handle.
Spotting Problems with Your Chainsaw Brake Handle
Some signs that show a chainsaw brake handle is not working properly include the following:
- Battery Chainsaw doesn’t stop or slow down when you want it to or takes a long time to stop.
- The brake handle is wobbly, loose, or has physical damage.
- The brake band is either too tight or too loose.
Common Issues to Look Out for in Your Chainsaw
Several issues can occur with your brake handle, but the most common ones include the following:
-
Stuck in an Engaged Position
Your chainsaw brake handle can get stuck in an engaged position. Due to this, the cutting machine’s blade cannot spin even when you engage the throttle.
-
Doesn’t Engage Correctly
The other common issue occurs when your cutting tool’s brake doesn’t engage properly. This happens due to the sawdust and debris accumulation in the brake handle mechanism.
When to Replace a Chainsaw Brake Handle?
It’s crucial to replace the brake handle immediately to ensure the safe and efficient operation of the chainsaw when you’re unable to resolve its issues. Here’s when you need to replace the brake handle:
- If cleaning the debris accumulation in the brake handle doesn’t resolve the issue.
- If the brake handle is worn out, cracked, or broken.
- If the mini chainsaw continues to rotate even when you engage the brake handle.
Frequently Asked Questions
How do you remove a chainsaw handle?
To remove a chainsaw brake handle, first, remove the spark plug wire and the side cover from the cutting tool. Then loosen the brake band, disconnect the old brake handle, and extract the pivot pin connecting the handle to the brake band. Lastly, remove the brake band.
What is the brake on a chainsaw called?
The brake on a chainsaw is known as the “chain brake” or the “safety brake.” Typically, it is located close to the top of the chainsaw’s handlebar, and you can activate it manually or automatically.
The chainsaw brake is a critical safety feature to stop the cutting machine’s chain from spinning when engaged, preventing potential injuries or accidents.
Can you run a chainsaw without a brake?
No, it’s not recommended to run a chainsaw without a brake is not recommended, as it’s critical for preventing potential accidents and injuries. If you operate the machine without a brake, this can increase kickback risk, which can be dangerous or even fatal.
How do you check a chainsaw brake?
To check a chainsaw brake, switch on the machine and pull the brake handle towards the handlebar to engage it. If your cutting tool stops moving, this will indicate the brake is working properly.
In addition, accelerate the tool’s engine while holding the brake engaged. If your cutting tool doesn’t move, this will indicate the brake is engaging correctly.
Final Thoughts
After reading the above guide, hopefully, you now know how to replace the brake handle on a chainsaw. Remember, a malfunctioning brake handle can be potentially dangerous for your safety.
So it’s important to identify any issues beforehand. Follow the steps outlined in this guide, and wear proper gear. Lastly, replace a Husqvarna chainsaw brake handle or replace any other brake handle in a different brand of chainsaw safely.
- 5 Best Demolition Reciprocating Saw Blades for 2026 - July 9, 2026
- 5 Best Compact Portable Reciprocating Saws for 2026 - July 9, 2026
- 5 Best Reciprocating Saws Under $100 in 2026 - July 8, 2026