Ever struggled to make a clean, accurate cut, no matter how carefully you line it up? You’re not alone, mastering a miter saw takes more than just pulling a trigger. With years of experience cutting trim, frames, and flooring, I’ve learned that precision comes from patience, setup, and safety. If your cuts keep splintering or missing the mark, this guide will walk you through the right way to use a miter saw, step by step, so every cut feels smooth, sharp, and professional.
What Does a Miter Saw Do and Why Should You Use One?
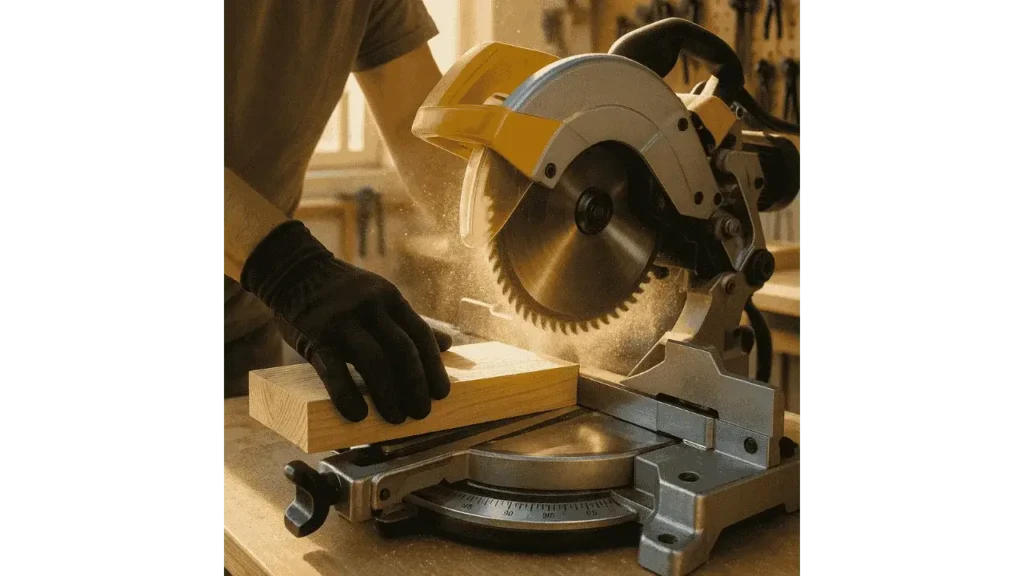
A miter saw is a stationary power tool designed for making precise crosscuts and angled cuts. It’s far more accurate and faster than a hand or circular saw. The blade, mounted on a pivoting arm, swings left or right to create perfect angles, ideal for trim, molding, and framing projects. What makes it so valuable is its ability to produce repeatable results; once you set your angle, the saw maintains it consistently. For homeowners and DIYers, it’s the simplest path to professional-quality results at home.
As woodworking instructor Mark Daniels often says,
“A miter saw isn’t about cutting faster, it’s about cutting smarter. The real advantage lies in the accuracy you can trust cut after cut.”
Related: What is a Miter Saw Used For?
How Can You Stay Safe Before Making Any Cuts?
Safety comes before every switch-on. Always wear goggles, ear protection, and a dust mask. Check that your blade guard moves freely, and make sure the saw is unplugged before making adjustments. Keep your hands far from the blade path and avoid loose clothing or jewelry. Secure the saw to a stable bench and clear the area of clutter or cords.
Professional carpenter Linda Reeves emphasizes this simple rule:
“A safe cut is a clean cut. If something feels unstable or rushed, step back, your best work happens when you’re steady and aware.”
Once you establish these habits, they’ll become as routine as measuring your wood before cutting.
How Can You Make a Basic Cut with a Miter Saw?
Learning to make accurate cuts is the foundation of mastering your miter saw. Follow these clear, practical steps to ensure each cut is smooth, precise, and safe.
Step 1: Measure and Mark the Material
Use a sharp pencil to mark your cut line clearly on the wood. Always mark on the waste side of the material so your final piece remains the correct size.
Step 2: Position the Board Against the Fence
Place the board firmly against the fence to keep it steady. This ensures the material doesn’t shift while cutting, which is key to straight and accurate results.
Step 3: Set the Desired Angle
Adjust the miter or bevel setting based on the cut you need, and lock it in place. Double-check your angle to prevent errors before turning on the saw.
Step 4: Align the Blade with the Cut Line
Lower the saw (while it’s off) to line the blade edge with your pencil mark. This helps you confirm that the cut will land exactly where you intend.
Step 5: Power On and Let the Blade Reach Full Speed
Turn on the saw and wait until the blade reaches full rotation before cutting. Starting too soon can cause the blade to catch or splinter the wood.
Step 6: Lower the Blade Slowly Through the Material
Bring the blade down smoothly and steadily through the wood. Don’t force the cut, let the saw’s speed and sharpness do the work for you.
Step 7: Wait for the Blade to Stop Before Lifting
After the cut, keep the blade down until it stops spinning completely. Lifting it early can cause rough edges or pull the piece out of alignment.
How Do You Make Compound or Advanced Cuts Like a Pro?
For compound or multi-angle cuts, such as crown molding, you’ll need to adjust both the miter and bevel angles together. Always test these settings on scrap wood first, it saves time and materials. When cutting wide boards, use a sliding miter saw, pulling the blade out toward you before pushing it gently through the wood. If you’re repeating the same cut length, set up a stop block. It’s one of those workshop tricks that makes every cut perfectly consistent.
How Can You Improve Accuracy and Avoid Common Mistakes?
Precision comes from patience and practice. Always make test cuts before cutting your final piece. Cut on the waste side of your line to protect your measurements. Keep your blade clean to avoid drag or burning, and replace dull ones immediately.
As workshop trainer Ethan Cole puts it,
“True accuracy comes from patience, don’t chase perfection on the first cut, find it through careful setup and steady hands.”
One of the most common mistakes I’ve seen is lifting the blade before it stops, this can tear out fibers or chip edges. Let the saw do the work; forcing it only increases wear and inaccuracy.
How Do You Maintain and Calibrate Your Miter Saw for Long-Term Use?
After each project, unplug the saw and brush away sawdust. Clean around the blade housing, then use a combination square to verify that your fence and blade are still square. If your cuts start drifting, it’s time to recalibrate the angle stops. Replace dull or damaged blades right away, forcing cuts with a worn blade is unsafe and leads to rough results. A few minutes of maintenance after every use ensures your miter saw stays accurate and ready for years.
Recommended Read: How to Sharpen a Miter Saw Blade?
FAQs About Using a Miter Saw:
What’s the first thing you should do before using a miter saw?
Check your safety gear, confirm that the blade guard moves freely, and make sure the saw is unplugged before adjustments.
Can beginners safely use a miter saw?
Yes. Miter saws are among the easiest power tools for beginners as long as you follow safety rules and proper setup.
Why does my miter saw cut crooked or unevenly?
Crooked cuts usually come from a misaligned fence or a dull blade. Realign or replace the blade to restore accuracy.
Can I use a miter saw to cut metal or plastic?
Only with the correct specialty blade rated for those materials, and always at slower speeds for control.
Should I push or pull when cutting with a miter saw?
On sliding saws, pull the blade toward you first, then push it back gently through the material. Let the blade, not force, do the work.
Final Takeaways:
Learning how to use a miter saw isn’t just about operating a machine, it’s about gaining precision, patience, and control. With regular practice, you’ll start producing clean, accurate cuts that make your work look professional. Respect the tool, keep safety first, and take your time with each setup. Soon, you’ll move from cautious beginner to confident craftsman, creating projects that reflect true skill and care.
his personal experience and loves to share their nitty gritty details with his audience.
Although Richard does focus on other home improvement tools, his focus remains on cutting fallen trees or maintaining his backyard via chainsaw tools. He pledges to come up with new knowledge about chainsaws every once in a while.
- 7 Best Professional Jigsaws Tested for 2026 - January 20, 2026
- 7 Best Jigsaws for Home Use in 2026 - January 20, 2026
- 7 Best Jigsaws for Beginners Tested in 2026 - January 20, 2026