I’ve learned from years of woodworking that a dull miter saw blade can turn clean cuts into frustration fast. When the blade starts dragging, burning the wood, or leaving rough edges, it’s time to act. Sharpening it yourself isn’t complicated, you just need the right tools and a careful hand. In this step-by-step guide, I’ll show you how to sharpen your miter saw blade safely and correctly so you can restore smooth, accurate cuts.
How Can You Tell When It’s Time to Sharpen or Replace a Miter Saw Blade?
Start by watching how your saw performs. If it begins to resist the cut, tear the wood fibers, or leave burn marks, the blade’s edge is dull. You’ll often hear the motor strain or feel vibration in the handle. That’s your cue to sharpen. However, if you notice chipped teeth, cracks, or a warped blade, it’s best to replace it instead. A carbide-tipped blade can usually be sharpened four to five times before it reaches its limit.
Mike Rowe, Tool Technician explains,
“Most people wait until their saw practically smokes before they sharpen. By that point, you’ve already overworked your motor and dulled your cuts. Sharpening early always saves both time and money.”
Related: How to Change a Miter Saw Blade?
What Tools and Safety Gear Should You Use Before Sharpening?
Gather everything before starting. You’ll need a fine diamond file or a circular saw sharpener, a sturdy vise or jig, a marker, and a brush for cleaning. Always wear safety gloves and goggles. Disconnect your saw from power to avoid accidents and make sure your workbench is steady and well-lit.
Before sharpening, clean the blade completely. Resin or sawdust buildup makes filing uneven. A simple mix of warm water and dish soap works great, just dry the blade well to prevent rust.
Laura Benton, Carpentry Instructor says,
“A clean blade sharpens twice as accurately. Dirt and resin buildup may look harmless, but it throws off your filing angle and shortens the life of your blade.”
Step-by-Step Guide: How to Sharpen a Miter Saw Blade by Hand?
Sharpening your miter saw blade is quick and straightforward if you stay patient and consistent. Here’s how to do it right.
Step 1: Remove and Secure the Blade
Unplug your saw and carefully remove the blade. Place it in a vise or sharpening jig with the teeth facing toward you. Make sure it’s tight enough to stay steady while you work.
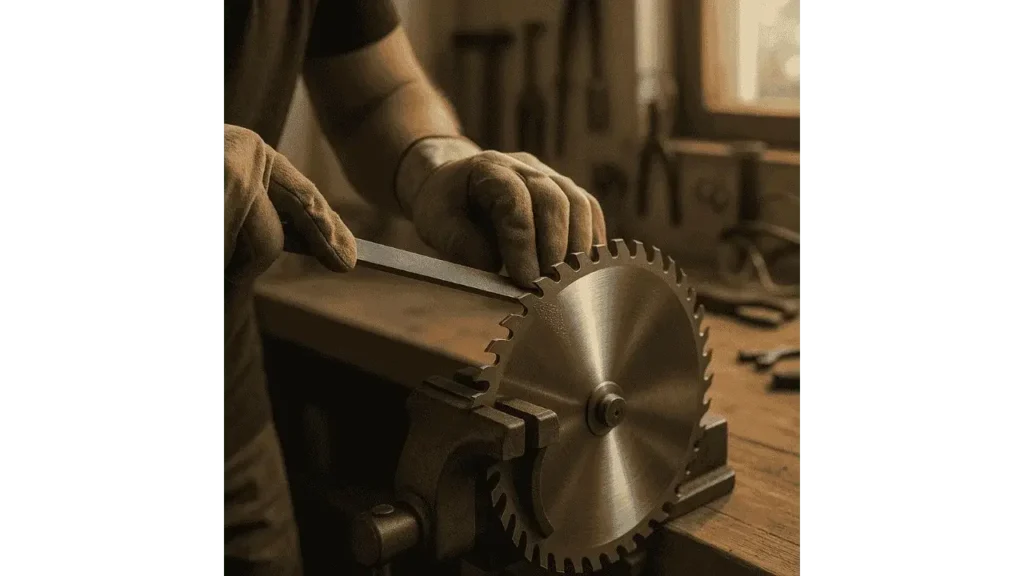
Step 2: File Each Tooth Evenly
Use a fine diamond file and follow the factory bevel on each tooth. Make two or three light, even strokes on each one. Keep your rhythm steady and avoid pressing too hard.
Jason Reed, Woodshop Owner says,
“Sharpening is all about consistency. Light, even pressure wins every time, one heavy stroke can ruin the tooth’s geometry and undo the entire edge.”
Step 3: Rotate and Sharpen the Opposite Side
After finishing one side, flip or reposition the blade and sharpen the opposite teeth using the same technique. Consistency keeps the blade balanced and ensures smooth cuts.
Step 4: Check for Burrs and Balance
Inspect the blade closely. If you feel rough spots, use fine sandpaper or a honing stone to remove burrs. Hang the blade on a nail, if it tilts to one side, lightly file the heavier area until it balances perfectly.
Recommended Reading: What is a Miter Saw Used For?
How Do You Test a Miter Saw Blade After Sharpening?
Reinstall the blade and make a test cut on scrap wood. The saw should glide through smoothly without smoke or vibration. A clean, quiet hum means your sharpening worked. If it still drags, repeat a few light strokes on any uneven teeth.
How Can You Keep a Miter Saw Blade Sharp for Longer?
Once sharpened, treat your blade with care. Always use the right blade for the material you’re cutting, and let the saw reach full speed before it touches the wood. After each use, wipe the blade clean and store it in a dry, safe spot. Avoid cutting nails or screws. Those will ruin even the sharpest edge. Consistent care keeps your blade performing like new.
What Are the Most Common Mistakes to Avoid When Sharpening?
Never press down too hard with the file; light, even strokes are more effective. Don’t skip cleaning before you start, since debris can throw off your angles. Filing in the wrong direction or over-filing the teeth can damage balance and shorten blade life. Work slowly and carefully; the goal is precision, not speed.
You Might Also Like: How to Use a Miter Saw?
FAQs About Sharpening a Miter Saw Blade:
How often should I sharpen my miter saw blade?
About every 25–30 hours of use, or whenever you notice drag, smoke, or rough edges.
Can I sharpen a carbide-tipped blade myself?
Yes, you can. Use a diamond file and follow the existing bevel carefully. For heavily used blades, consider professional sharpening.
Does sharpening reduce the blade’s size?
Only slightly, if done correctly. Proper technique keeps the diameter and balance nearly unchanged.
What’s the best way to clean a blade before sharpening?
Warm water with dish soap and a soft brush is enough. For stubborn buildup, a commercial cleaner works well.
Is it worth sharpening old blades more than once?
Absolutely. Quality carbide blades can handle several sharpening’s as long as the teeth remain intact.
Final Takeaways:
After sharpening countless blades over the years, I’ve seen how a sharp miter saw blade changes the entire job. It cuts smoother, safer, and with far less effort. Keep your blade clean, sharpen it regularly, and you’ll notice every project feels easier and looks more professional.
his personal experience and loves to share their nitty gritty details with his audience.
Although Richard does focus on other home improvement tools, his focus remains on cutting fallen trees or maintaining his backyard via chainsaw tools. He pledges to come up with new knowledge about chainsaws every once in a while.
- 7 Best Professional Jigsaws Tested for 2026 - January 20, 2026
- 7 Best Jigsaws for Home Use in 2026 - January 20, 2026
- 7 Best Jigsaws for Beginners Tested in 2026 - January 20, 2026