Nothing slows down a project faster than a dull chop saw blade. Instead of clean, precise cuts, you’re left fighting burn marks, rough edges, and a saw that feels underpowered. Knowing how to sharpen a chop saw blade at the right time not only saves you from frustration but also prevents costly blade replacements. We’ll go through the tools, steps, and expert tips that make sharpening simple and safe, while also pointing out when replacement is the smarter option.
What Types of Chop Saw Blades Can Be Sharpened?
Not all blades are created equal. Standard steel-tooth blades are fairly easy to sharpen at home and can be re-sharpened several times. Carbide-tipped blades, on the other hand, are harder and require diamond files or grinders. Professional sharpening services for carbide blades can cost more but often extend their life far longer than DIY efforts. If teeth are missing or the blade is cracked, sharpening isn’t worth it, you’re better off replacing the blade.
What Tools Do You Need to Sharpen a Chop Saw Blade?
To sharpen a chop saw blade properly, you’ll need a few essential tools. A diamond file or a bench grinder with a fine wheel handles the sharpening, while a sturdy vise or clamp keeps the blade secure during the process. Safety gear like gloves, goggles, and a dust mask is a must for protection, and a brush or solvent helps clean away pitch and resin buildup. A clean surface makes a huge difference, as sharpening through dirt or resin buildup leads to uneven results. Having these tools ready before you start makes the job smoother and reduces the chance of mistakes.
Step-by-Step Guide: How to Sharpen a Chop Saw Blade?
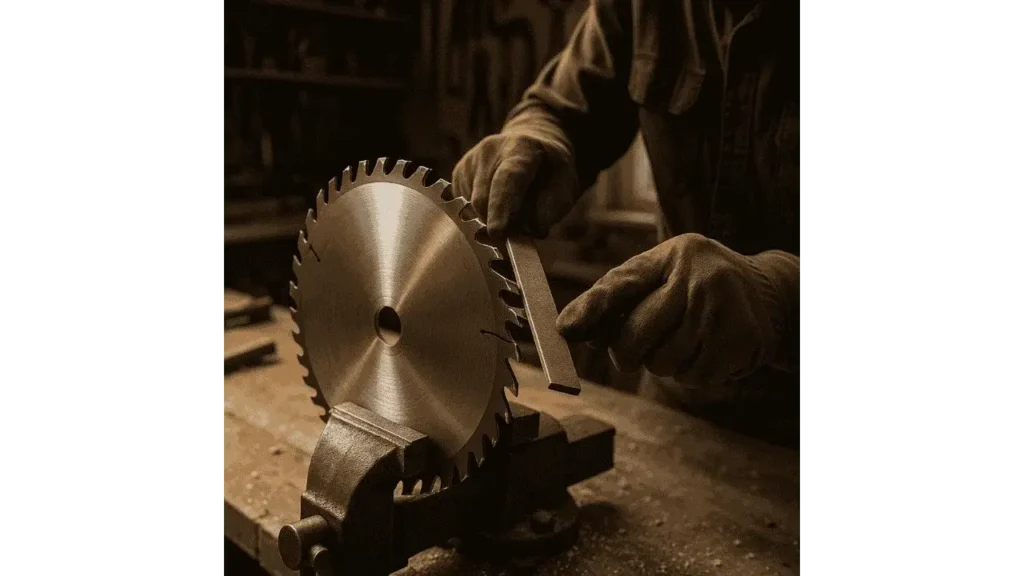
Step 1: Remove and Clean the Blade
Unplug your saw for safety, then carefully remove the blade. Secure it in a vise or clamp with the teeth facing you. Before sharpening, clean off all debris, resin, or pitch using a stiff brush and cleaning solution. A dirty blade won’t sharpen evenly and may hide damage, so this step is essential.
Step 2: Secure the Blade in Position
Once clean, make sure the blade is firmly locked in the vise. It should be stable and at a comfortable height so you can work without shifting angles. Stability ensures every tooth is sharpened evenly, which prevents imbalance and wobble during cutting.
Step 3: Sharpen Each Tooth
Using a diamond file or grinder, match the original angle of the tooth. File lightly, keeping strokes consistent and working in the same direction each time. Focus on restoring sharpness rather than reshaping the tooth. If you’re working on carbide-tipped teeth, use gentle pressure, a heavy hand can crack the carbide tip.
Professional sharpener Marta Lopez often says,
“Consistency is everything. If even one tooth is sharpened off-angle, the blade won’t cut smoothly and you’ll feel the difference immediately.”
Step 4: Work Your Way Around the Blade
Continue sharpening one tooth at a time, moving carefully around the blade. Many experts mark the first tooth with a marker so you know when you’ve completed a full circle. Sharpening evenly is the key to a balanced blade and smooth cutting performance.
Step 5: Check Tooth Height and Consistency
After sharpening, check that all teeth are the same height. If one tooth is shorter than the rest, it won’t cut properly and will throw off balance. Use a flat file to level teeth if needed. Consistency ensures every tooth shares the workload during cutting.
As toolmaker Daniel Wright explains,
“Even a fraction of difference in tooth height can throw off balance. Precision at this stage is what separates a smooth cut from a struggling saw.”
Step 6: Reinstall and Test the Blade
Reattach the blade to your saw and make a few test cuts on scrap wood or metal. Listen for unusual noise, vibration, or drag. If the blade cuts smoothly and without resistance, the sharpening was successful. If not, check for uneven sharpening or missing teeth, it may need another pass or professional attention.
Related: What is a Chop Saw Used For?
What Are the Common Mistakes to Avoid When Sharpening a Chop Saw Blade?
One of the easiest mistakes to make is filing too aggressively, removing too much material shortens blade life and weakens its strength. Another is changing the original tooth angle, which throws off cutting performance and creates rough results. Skipping the cleaning step is also a problem since buildup blocks the file from working evenly. The best approach is steady, light strokes and consistency, patience always beats speed.
How Do You Maintain a Chop Saw Blade After Sharpening?
Keeping a blade sharp doesn’t end after filing, it comes down to how you use it. Never force material through the saw; let the blade glide naturally to reduce stress on the teeth. After big projects, clean off resin and sawdust to prevent buildup that dulls the edge faster. Store blades in a dry space, ideally in protective cases or sleeves, so the teeth don’t knock against each other. These small habits, in my experience, easily double the lifespan of a blade.
As carpentry specialist Ethan Cole points out,
“The best way to keep a blade sharp isn’t sharpening it more often, it’s keeping it clean and handling it with care.”
Recommended Read: How to Use a Chop Saw?
FAQs About Sharpening Chop Saw Blades:
How do you sharpen a chop saw blade at home?
You can sharpen a chop saw blade at home using a diamond file or bench grinder. Secure the blade in a vise, clean it thoroughly, then sharpen each tooth carefully while matching the original angle. Always wear safety gear and test the blade after sharpening.
Can I sharpen a carbide-tipped chop saw blade at home?
Yes, but only with a diamond file or grinder. Most homeowners prefer sending carbide blades to a professional shop for precision and safety.
How often should I sharpen my chop saw blade?
It depends on usage. For frequent projects, check monthly for dullness. Occasional users should inspect before every major project.
Is sharpening always cheaper than replacing?
In most cases, yes, especially for steel blades. For carbide blades, sharpening is cost-effective until wear or damage makes replacement unavoidable.
What happens if I keep using a dull blade?
You’ll put unnecessary stress on your saw, risk damaging material, and increase the chances of accidents due to kickback or slipping cuts.
Final Takeaways:
A sharp chop saw blade is the difference between a clean, professional cut and a frustrating, unsafe struggle. By following these steps, you’ll know exactly how to sharpen a chop saw blade at home while avoiding the most common mistakes. With regular maintenance and proper storage, your blades will last longer and perform better. And when sharpening isn’t enough, don’t hesitate to replace, because safety and quality are always worth it.
his personal experience and loves to share their nitty gritty details with his audience.
Although Richard does focus on other home improvement tools, his focus remains on cutting fallen trees or maintaining his backyard via chainsaw tools. He pledges to come up with new knowledge about chainsaws every once in a while.
- 7 Best Professional Jigsaws Tested for 2026 - January 20, 2026
- 7 Best Jigsaws for Home Use in 2026 - January 20, 2026
- 7 Best Jigsaws for Beginners Tested in 2026 - January 20, 2026