Having maintained and repaired garden equipment professionally for over a decade, I’ve learned that wall-hanging setups not only preserve the blade but also make any workspace feel more structured and efficient. Leaving a pole saw leaning in a corner or tucked behind a workbench can lead to warping, accidental damage, or even injury. By hanging it on the wall with proper support, you’re keeping the tool in better condition and creating a safer environment.
Why Is Wall Storage Better Than the Floor?
Pole saws can be heavy and difficult to store safely. If left lying around, they’re more likely to fall, get stepped on, or wear unevenly. That can dull the blade or bend the pole. Hanging it on the wall keeps the tool stable and out of the way.
Hanging the saw also makes your space safer.
“When sharp tools are stored overhead and out of reach, the risk of household accidents drops significantly,” says Leo Watterson, a certified garage organization specialist based in Oregon.
A mounted saw keeps sharp blades away from pets or children. It also reduces clutter and gives every tool a defined place, making it easier to keep the area clean and efficient.
Choosing the Right Wall Spot
Pick a wall that stays dry year-round. Avoid areas near water heaters, windows, or damp corners. A clean, interior garage wall or dry shed space is ideal. Mounting the saw at chest or shoulder height makes it easier to lift and store without strain.
If you’re installing drywall, locate the studs before drilling. Use a stud finder and mark them clearly. Mounting hardware must go into solid wood to hold the pole saw safely.
Mounting Your Pole Saw the Right Way
Step 1: Measure the Full Length
Retract the pole saw and measure its total length. Mark this length on the wall using pencil or painter’s tape. This gives you a better idea of spacing before mounting anything.
Step 2: Choose the Right Hooks or Brackets
Use strong metal hooks, garage hangers, or utility brackets. They should support more than the pole saw’s weight. Check the hardware’s load rating before installation.
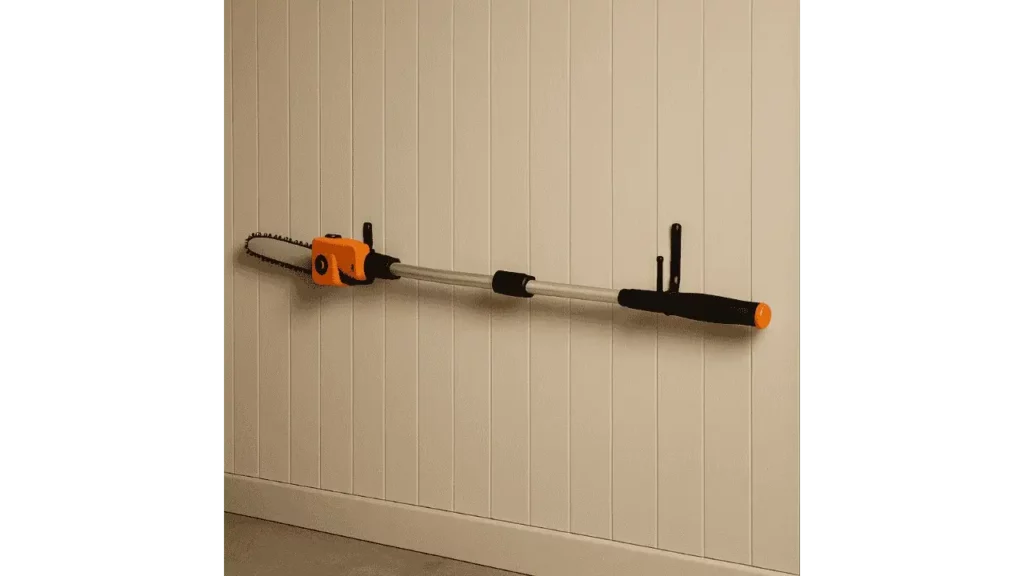
Step 3: Mount Two Hooks for Balanced Support
Install one hook near the blade end and one closer to the handle. Two points of support keep the saw straight and stable. Make sure nothing interferes with a battery pack, locking mechanism, or the grip.
Step 4: Hang and Test for Stability
Place the saw gently into the hooks. Test its stability by lifting it off and rehanging it a few times. Adjust the hook angle or depth if the saw tips forward or doesn’t sit securely.
Storage Tips After Mounting
Cover the blade, even when it’s stored. This prevents injury and keeps the edge from dulling. If your saw doesn’t include a cover, get a universal one that fits snugly.
Clean and dry the blade before hanging. Never store a dirty or wet pole saw; it leads to rust and corrosion. Keep it away from heaters, vents, or damp corners.
Final Takeaways
Wall-mounting your pole saw protects both the tool and your space. It keeps sharp edges secure, prevents blade damage, and reduces clutter. With strong brackets and a dry mounting location, you’ll make sure the saw lasts longer and stays in better shape. A simple change like this makes tool storage safer, cleaner, and more reliable.
his personal experience and loves to share their nitty gritty details with his audience.
Although Richard does focus on other home improvement tools, his focus remains on cutting fallen trees or maintaining his backyard via chainsaw tools. He pledges to come up with new knowledge about chainsaws every once in a while.
- 7 Best Professional Jigsaws Tested for 2026 - January 20, 2026
- 7 Best Jigsaws for Home Use in 2026 - January 20, 2026
- 7 Best Jigsaws for Beginners Tested in 2026 - January 20, 2026