Cutting plexiglass, often referred to as an acrylic sheet, with a circular saw can be an efficient and clean way to handle thicker material when you need a precise, straight edge. The job involves selecting the right sheet, choosing the appropriate carbide-tipped blade, preparing a stable worktable, and handling the sheet with the kind of care that prevents cracking or chipping. A circular saw excels with thicker sheets because it holds a straight line better than tools like a jigsaw or an oscillating multi-tool, which tend to vibrate the material. The main risks are forcing the saw, cutting too fast, or failing to secure the sheet, and over time I’ve learned that the most reliable results come from slow preparation, steady technique, and a proper finish afterward.
What Kind of Plexiglass and Thickness Are Suitable for a Circular Saw?
Plexiglass is a strong but somewhat brittle acrylic material, and it behaves differently from wood or metal when you cut it. A circular saw works best on medium to thicker sheets, where the material has enough rigidity to remain stable under the circular saw blade. Very thin acrylic is more likely to flex along the cutting line, and that movement can cause the sheet to crack or chip even if you cut slowly and carefully. In those cases, the score-and-snap method using a utility knife to lightly score and snap the sheet tends to be more predictable. Density varies among brands, and some manufacturers produce softer acrylic that melts easily, so the presence of a protective film and the quality of the sheet both play a role in how cleanly and accurately you can cut plexiglass with a saw.
What Tools, Blade Types and Accessories Do You Need for the Job?
A handheld circular saw or a table-mounted version can both cut plexiglass effectively as long as they are paired with a fine-toothed blade designed for plastics or a high-quality carbide-tipped blade that can produce a chip-free cut. The work surface should be a flat, stable work table with sturdy support underneath so the sheet doesn’t vibrate. Clamps are essential; you must securely clamp the acrylic sheet to keep it from shifting as you cut. Leaving the protective film on both sides helps prevent scratches, and a strip of painter’s tape placed along the cutting line mark reduces chipping at the edge. A straight-edge ruler or guide helps you align the saw for a clean and accurate cut. Proper safety gear is important as well, including safety glasses, hearing protection, gloves, and a dust mask because fine acrylic particles can become airborne during the cut.
How Should You Prepare the Plexiglass Before Cutting?
Good preparation determines the quality of the finished cut. Begin by measuring the sheet carefully using a ruler or straight-edge and marking the line clearly with a dry-erase marker or tape so you can follow the line without hesitation. Leave the protective film in place and apply a clean strip of painter’s tape along both sides of the cutting line to reduce the risk of chipping. Place the sheet on the table so the overhang is safe, and then clamp the material firmly to keep it from flexing while you work.
As plastics technician Evan Corbin, who has worked with acrylic fabrication for two decades, often says,
“The cut is only as good as the setup; acrylic rewards patience and punishes shortcuts every time.”
What Cutting Technique Should You Use with the Circular Saw?
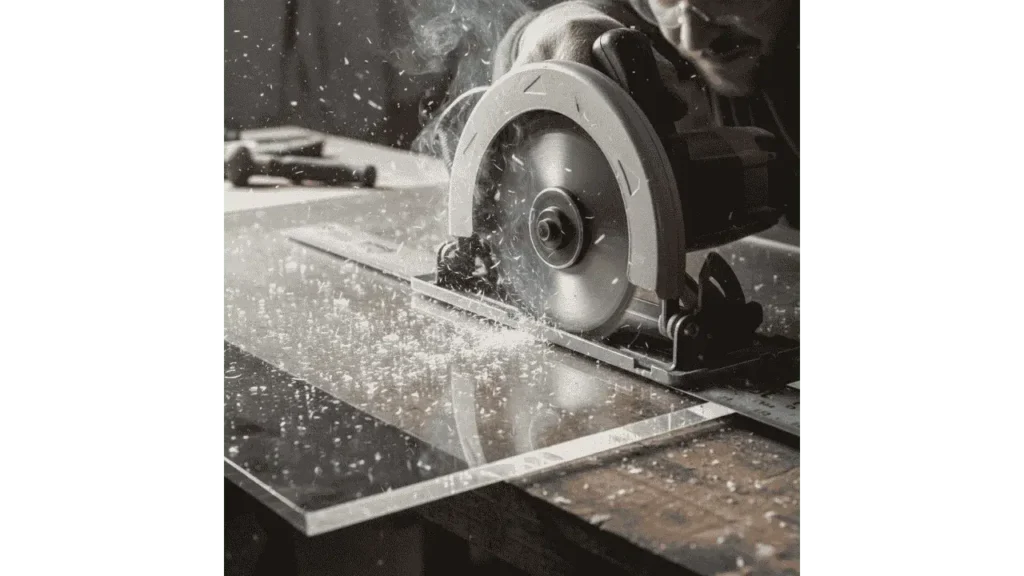
Before bringing the saw to the material, set the cutting depth so the blade extends only a millimeter or two beyond the thickness of the sheet. This keeps the action controlled and helps you maintain a cleaner edge. Position the saw so that the blade lines up precisely with the cutting line, and hold the saw firmly as you start it. Allow the blade to get up to speed before touching the acrylic, because a blade that isn’t spinning fast enough is more likely to chip or grab the surface. As you cut, feed the saw slowly and steadily, letting the blade do its work instead of pushing aggressively. Supporting the cut side of the sheet prevents the trailing edge from dropping or cracking as the cut finishes, and maintaining that support is essential for a clean and accurate line.
What Finishing Steps Are Important After Cutting Plexiglass?
Once the cut is complete, remove the protective film and examine the edge. Most cuts benefit from lightly sanding the edge with 200-grit paper to smooth any roughness left behind by the blade. Move the sandpaper in gentle, even strokes until the edge looks uniform. Clean the sheet with a soft cloth and an acrylic-safe cleaner, taking care to avoid ammonia-based products that can damage the surface. After cleaning, inspect the edge for small chips or micro-cracks; if needed, further finishing like polishing or flame-treating can bring the acrylic to a professional level of clarity.
What Common Mistakes Should You Avoid When Cutting Plexiglass?
The most common mistake is using a coarse blade intended for wood, because the large teeth tend to grab the acrylic and fracture it. Another frequent issue is cutting too quickly, which generates heat and may cause melting or clogging near the cut. Many DIY users also cut without clamping the sheet, and even slight movement can result in a jagged line. Removing the protective film too early exposes the sheet to scratches, and neglecting the trailing support can cause the acrylic to crack under its own weight.
As fabrication specialist Marina Holt often reminds beginners,
“Acrylic is unforgiving to impatience; if you rush the cut or skip support, the sheet will show every mistake.”
Frequently Asked Questions (FAQs)
Q1: Can I cut very thin plexiglass with a circular saw?
While you can, it’s not always the best method. Thin sheets tend to flex and vibrate under the saw, which increases the risk of cracking or chipping. For sheets under about 3/16″ (~5 mm) thick, scoring and snapping might be safer.
Q2: What type of blade should I use when cutting plexiglass with a circular saw?
Use a carbide-tipped finishing blade with a high tooth count and fine teeth designed for plastics or plywood. This type reduces heat and chipping. Using a coarse-tooth wood blade may cause melt marks or cracking.
Q3: How can I avoid chipping the edge of plexiglass when making the cut?
Several steps help: leave the protective film on, apply painter’s tape over the cut line, clamp the sheet securely, feed the saw slowly, and support the off-cut side to prevent vibration or collapse. All these reduce stress on the cut edge.
Q4: Is it necessary to use a guide or straight edge when cutting plexiglass?
Yes, a guide or straight edge helps ensure a clean straight cut, especially since plexiglass is prone to wandering or splintering when the saw base slips. Clamp a straight piece of wood or use a commercial guide to keep the saw aligned.
Q5: After cutting, what care should I take for the plexiglass edge and sheet surface?
After cut, remove protective film, lightly sand the edge with 200-grit sandpaper to remove burrs, and clean the surface with a soft cloth and acrylic-safe cleaner. Avoid harsh chemicals. Also inspect for micro-cracks and handle the sheet gently thereafter.
Final Takeaways
Cutting plexiglass with a circular saw is highly effective when you choose the right material, use a fine-toothed or carbide-tipped blade, and feed the saw with controlled, consistent pressure. Preparation matters just as much as the cut itself, because the combination of accurate measuring, careful marking, proper clamping, and intact protective film sets you up for a chip-free edge. Allowing the blade to reach full speed before contact and supporting the sheet as you work dramatically reduces cracking. Finish the edge with gentle sanding and proper cleaning to keep the acrylic clear and durable. Keep in mind that while circular saws are excellent for thicker sheets and straight cuts, thinner or curved cuts may call for scoring, a jigsaw, or another method better suited to the material’s flexibility.
his personal experience and loves to share their nitty gritty details with his audience.
Although Richard does focus on other home improvement tools, his focus remains on cutting fallen trees or maintaining his backyard via chainsaw tools. He pledges to come up with new knowledge about chainsaws every once in a while.
- 7 Best Professional Jigsaws Tested for 2026 - January 20, 2026
- 7 Best Jigsaws for Home Use in 2026 - January 20, 2026
- 7 Best Jigsaws for Beginners Tested in 2026 - January 20, 2026