Over the years of working with saws on countless projects, nothing has slowed me down more than a dull blade. I still remember one job where the cuts kept smoking and binding until it became clear the blade was completely worn out. Swapping it for a fresh one transformed the saw, it was smoother, faster, and much safer to operate. Changing a blade might seem intimidating if you’ve never done it before, but the process is straightforward once you understand the signs, gather the right tools, and follow the proper steps from start to finish.
Tools and Safety Gear You’ll Need:
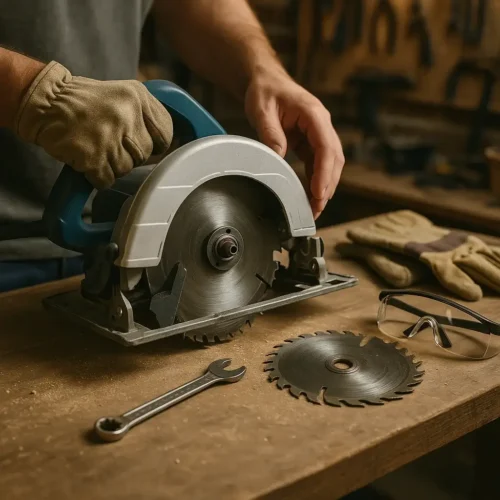
Essential Tools for the Job
Most circular saws come with a wrench designed specifically for loosening the arbor nut, but any correctly sized wrench will do the job. Some saws include a blade lock button that prevents the blade from spinning while you loosen the nut, while others may require wedging a piece of scrap wood against the teeth. Either way, the right tool makes the process smoother and much safer.
Protective Equipment to Stay Safe
Safety gear is just as important as the tools themselves. A good pair of safety glasses will protect your eyes from metal shavings or dust when the blade is removed, and sturdy gloves reduce the chance of cutting your hands on sharp teeth. Even though the saw is powered off during the change, handling blades directly can still lead to injuries if you are not careful.
Preparing the Saw Before Blade Change:
Disconnecting Power or Battery
Always begin by completely cutting power to the saw. For corded saws, unplug the machine entirely, and for cordless models, remove the battery pack. This one step may seem simple, but it is the most important for safety because it prevents the saw from starting accidentally while your hands are near the blade.
Positioning the Saw Securely
Set the saw down on a stable work surface such as a solid workbench or a pair of sawhorses. The saw should not wobble or shift while you are loosening the nut or handling the blade. A firm and steady position makes the task much easier and also gives you more control as you work through each step of the change.
Step-by-Step Blade Replacement:
Step 1: Locking the Blade in Place
Engage the blade lock button if your saw has one, as this keeps the blade from turning while you loosen the nut. If the saw does not include a lock, wedge a scrap piece of wood firmly against the blade teeth to hold it still. Taking time to secure the blade prevents slips and makes loosening the nut much more straightforward.
Step 2: Removing the Arbor Nut and Old Blade
With the blade secured, use the wrench to turn the arbor nut counterclockwise until it loosens. Once the nut and washer are removed, carefully slide the old blade off the arbor. Always handle the blade with care because even worn blades can still be sharp enough to cut skin if you grab them the wrong way.
Step 3: Installing the New Blade in the Right Direction
Place the new blade onto the arbor, ensuring that the teeth face in the correct cutting direction. Most circular saws include a small arrow on the blade guard showing the rotation of the blade, and this should match the arrow printed on the blade itself. Installing it backward is a common mistake, so double-check before tightening the nut.
Step 4: Tightening the Nut and Securing the Blade
Once the new blade is seated, reinstall the washer and arbor nut. Use the wrench to tighten the nut firmly so that the blade is secure, but avoid using excessive force. Over-tightening can damage the threads or make future blade changes unnecessarily difficult, while under-tightening leaves the blade unsafe to use.
Step 5: Checking the Saw Before Use
Before reconnecting power, spin the blade gently by hand to ensure it moves smoothly without wobbling or rubbing. Once it looks secure, plug the saw back in or reattach the battery. Make a quick test cut on a scrap piece of wood to confirm that the blade is seated correctly and that the saw is cutting cleanly and without hesitation.
Choosing the Right Blade for Your Saw:
Correct Blade Size and Arbor Match
Always make sure that the blade matches both the diameter and arbor size specified by your saw manufacturer. Using the wrong size may prevent the blade from fitting properly or cause dangerous vibrations during use. A blade that fits perfectly will cut more efficiently and extend the life of your saw.
Tooth Count and Blade Material
Blades are not all the same, and choosing the right one makes a big difference. Blades with fewer teeth cut faster but leave a rougher finish, while blades with more teeth provide a smoother, cleaner cut. For most household projects, carbide-tipped blades are the best choice since they stay sharp longer and can handle hardwoods, sheet goods, and even some plastics with ease.
Mistakes to Avoid During Blade Changes:
Installing the Blade Backwards
Installing a blade the wrong way around is one of the most common mistakes people make. A backwards blade will not cut properly, and it may also cause damage to both the saw and your workpiece. Always check the direction arrows on both the saw and the blade before tightening the nut to avoid this problem.
Over-tightening or Under-tightening the Nut
Tightening the arbor nut incorrectly can create serious issues. A nut that is too loose allows the blade to slip during use, while one that is too tight risks damaging the arbor or making the blade impossible to remove later. The goal is to secure it firmly without excessive force, giving the blade stability while still allowing future changes.
Using an Incompatible Blade
Never attempt to install a blade that does not fit the specifications of your saw. Even if it looks close in size, an incompatible blade can throw the saw off balance or put unnecessary strain on the motor. Always check compatibility before purchasing, as this small step ensures safety and reliable performance.
Related: How to Use a Circular Saw?
Final Takeaways:
Changing a circular saw blade is one of those tasks that might seem daunting the first time, but once you’ve done it, it becomes second nature. Following each step carefully not only improves the quality of your cuts but also keeps your saw running smoothly and safely. A fresh blade provides cleaner results, reduces strain on the motor, and makes every project easier. With regular maintenance and smart habits, you’ll always be ready to cut with confidence and get the best performance out of your saw.
his personal experience and loves to share their nitty gritty details with his audience.
Although Richard does focus on other home improvement tools, his focus remains on cutting fallen trees or maintaining his backyard via chainsaw tools. He pledges to come up with new knowledge about chainsaws every once in a while.
- 7 Best Professional Jigsaws Tested for 2026 - January 20, 2026
- 7 Best Jigsaws for Home Use in 2026 - January 20, 2026
- 7 Best Jigsaws for Beginners Tested in 2026 - January 20, 2026